

This post may contain affiliate links, which means if you click and/or make a purchase, I may earn a commission at no additional cost to you. Gifted products will be noted as such.
Every year I get a lot of requests for Christmas content and one of the most requested themes is decorating tips. I always decide on a theme for my Christmas decor and this year I decided on “Winter White”. It sounds so cozy and makes me picture snowflakes and fuzzy blankets and natural woodland scenes. I love to feature some sort of Christmas focal point in my bedroom each year. Last year, my Dad and I created this log backdrop (which is actually still up) and I will be using that again this year.
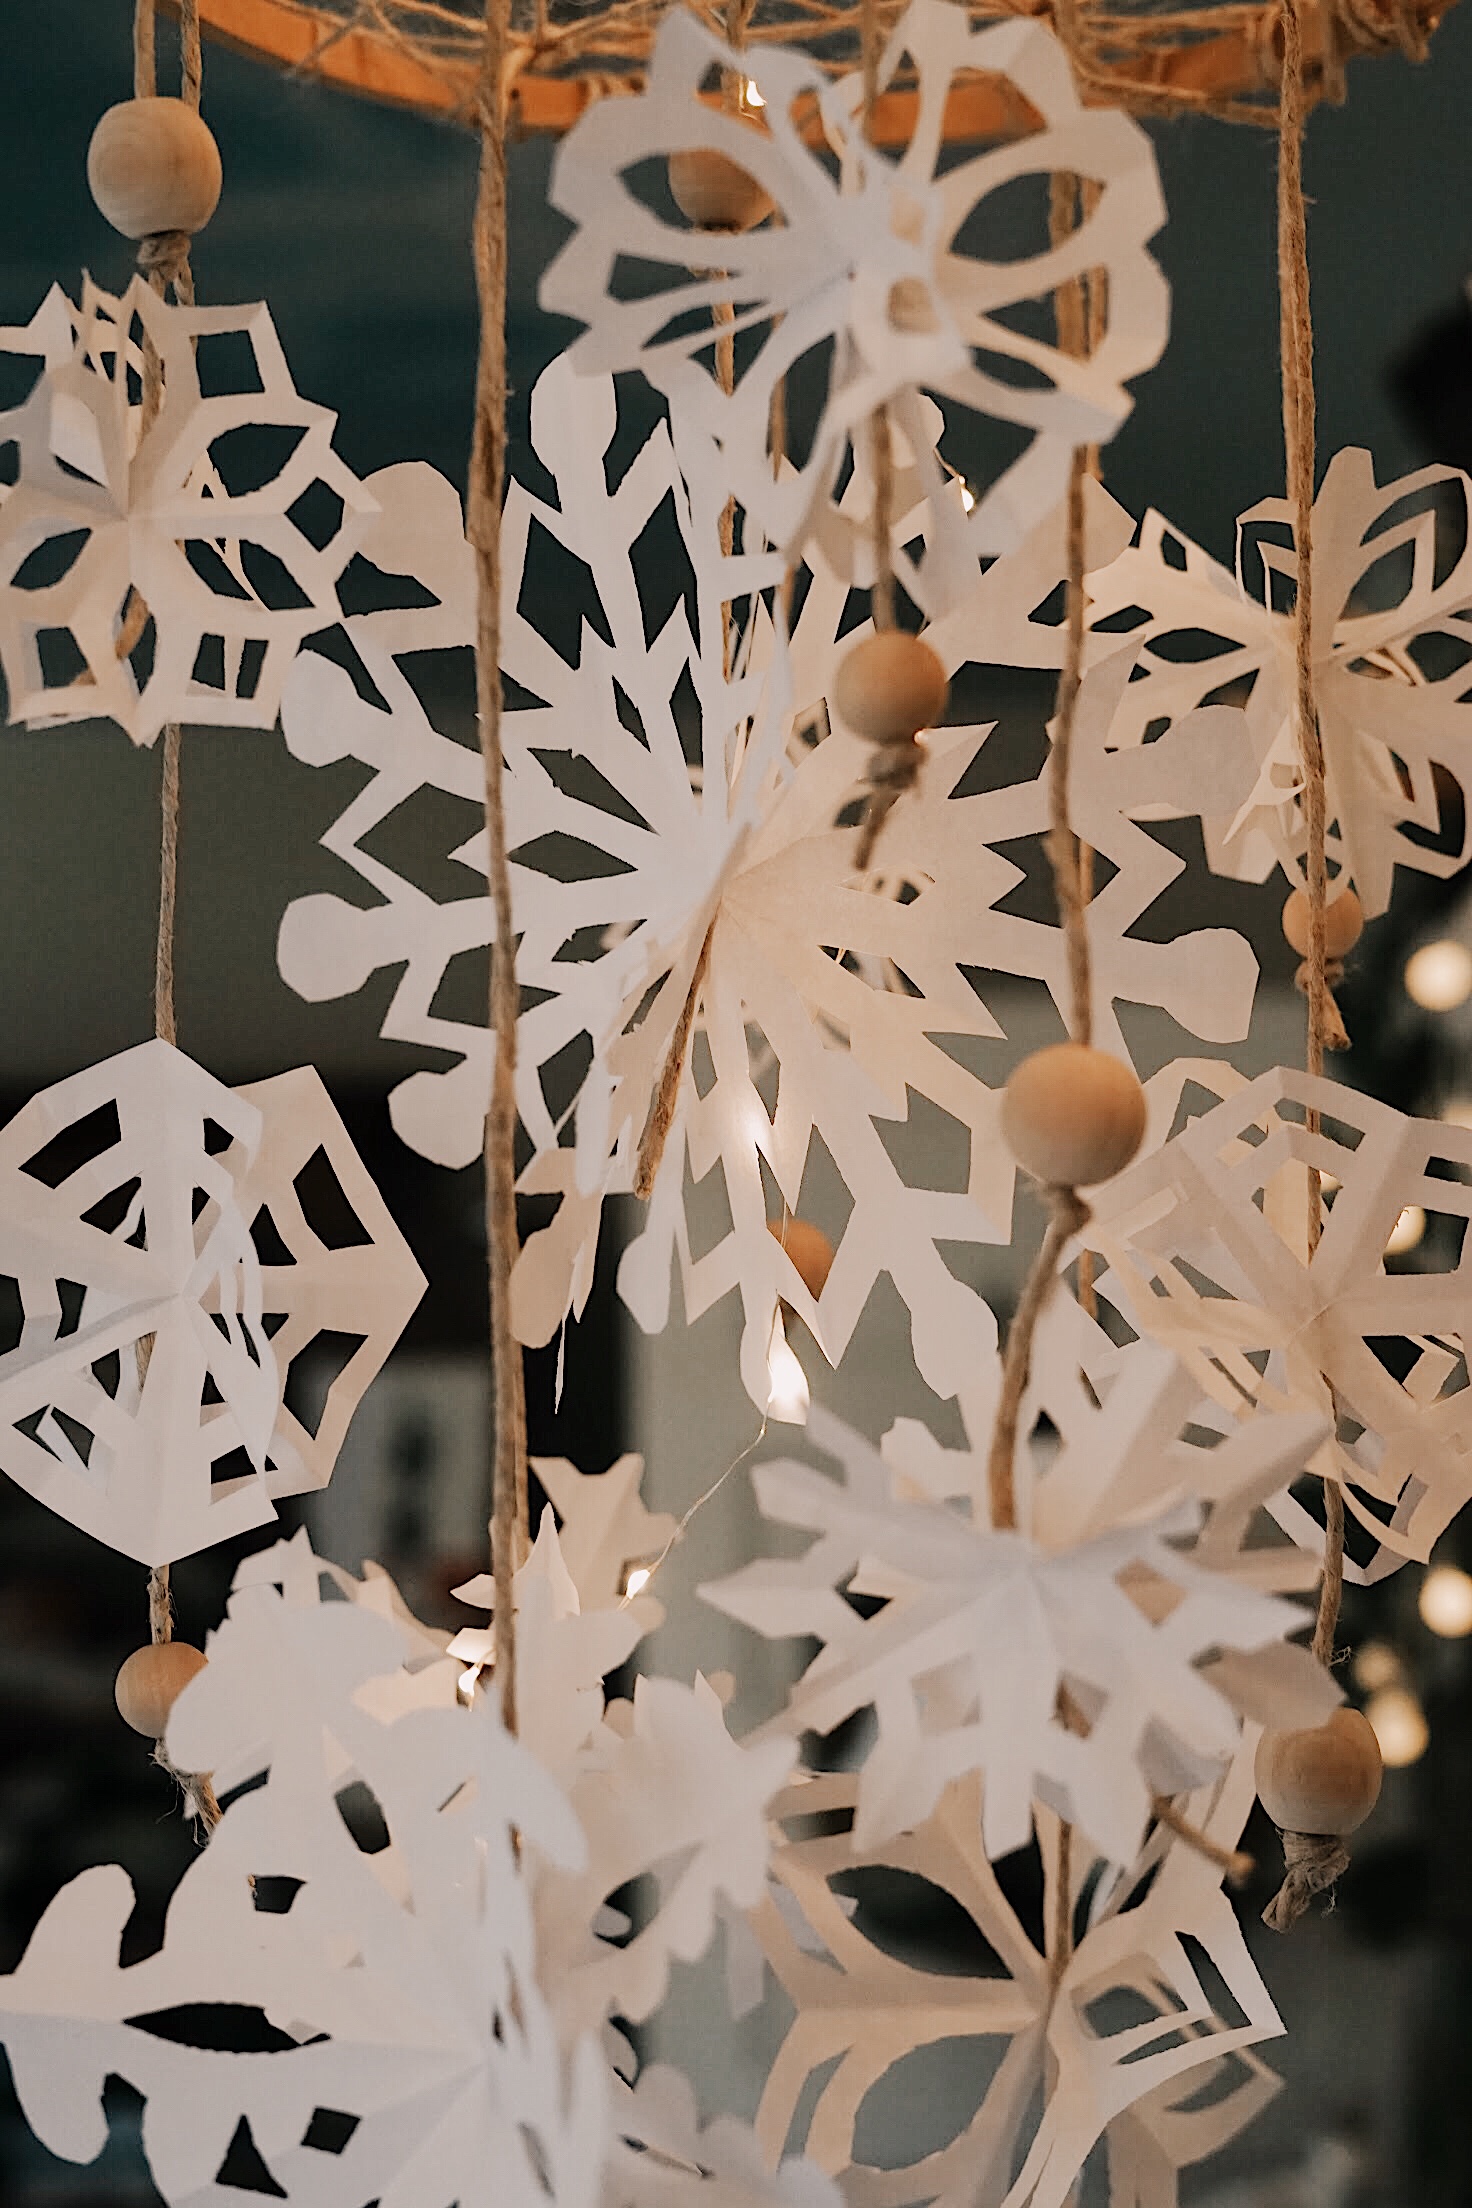
But there is always a soft spot in my heart for something ridiculous hanging from the ceiling in terms of decor and so the idea of a paper snowflake chandelier popped into my head. So let’s get to work!
DIY Supplies
- White Computer Paper Cut into Squares
- Scissors
- 14 Inch Embroidery Hoop
- Rope or String of Choice
- Raw Wood Beads


Step 1: Cut Paper Snowflakes
The first step is to cut a lot of heckin’ snowflakes. I cut two of each design so that I could glue them together to make a 3D snowflake. You will need to start with a square, fold it in half diagonally, then again meeting the farthest two corners, then into thirds. Remember back to elementary school art class! Cut the end off where the folds overlap, then start your design. You can google or search on Pinterest “snowflake template” to see how to make crazy designs or you can experiment with what you like! I used three different square sizes to vary the snowflake sizes; 8 inches, 6 inches, and 4 inches.
Step 2: Glue Snowflake Ornaments
Once I had two of every kind I began to glue the center folds together. I kept them creased with the original folds to help them look 3D instead of flattening them. I took my string and glued each matching snowflake on opposite sides of the string with hot glue.
Step 3: Assemble!
I originally ordered a 19 inch gold hoop from Amazon to structure my chandelier but it turned out that that was huge. I found an old wood embroidery hoop in the craft closet instead that had string strung across haphazardly. This was actually really helpful in order to hang snowflakes from different points inside the hoop.
At this point it was just random placement and string length. I placed the largest snowflake in the center and then varied the locations and sizes of the others based on what looked the best from all sides. I strung wood beads above and below the snowflakes for some fun detail.

Step 4: Let There Be Light
This turned out to be more like a snowflake mobile than a chandelier but I love it anyway! I placed a battery operated set of fairy lights on the top and strung it through the center to hang among the flakes. It would be fun to do 2 or 3 more strands to really make it glow!

Step 4: Hang That Thang
At the top of the embroidery hoop, I knotted three chords and pulled them together to make a loop to hang. I had some extra snowflakes so I glued them onto the strings for some more fun. I love all of the beautiful, haphazard snowflakes as they spin and twinkle among the lights 🙂


I hope this craft brings you joy and causes you to slow down at the beginning of this Christmas season. Pop some music on and start cutting those one of a kind snowflakes.
xoxo,
jojo
SHOP MY LOOK


1 Comment
My coworkers and I will be trying this tomorrow 🙂